High-Definition Metal Prints have exploded in popularity for a reason. Their vibrant colors, unparalleled clarity, and sleek, contemporary aesthetic make them a striking way to showcase your favorite photographs. Unlike traditional prints, metal prints infuse our images with a unique luminescence and depth, creating a genuinely captivating visual experience. But how do you best display these stunning pieces once you’ve invested? This guide will delve into framing and hanging techniques to help you elevate your metal print presentation to the next level.
The Allure of High-Definition Metal Prints for Fine Art Photography
Before jumping into the how-to, let’s briefly touch on why metal prints appeal. Printing involves infusing your image directly onto a specially coated aluminum sheet. This process results in:
- Exceptional Clarity and Detail: The colors are saturated, and even the finest details are precisely printed.
- Vivid Color: The smooth, reflective surface enhances color brilliance, giving your photos a depth and vibrancy that traditional prints often lack.
- Durability: Metal prints are scratch-resistant, waterproof, and UV-resistant, making them incredibly durable and long-lasting, ideal for various environments.
- Modern Aesthetic: Metal prints’ sleek, frameless look lends any space a sophisticated and contemporary feel.
While the frameless look is part of the appeal, sometimes adding a frame and choosing the right hanging method can enhance the overall presentation of your print. So, let’s explore how to do just that.
Why would you need to frame High-Definition Metal Prints?
High-Definition Metal Prints are often displayed without frames, allowing their clean lines and vibrant images to take center stage. However, framing can add a layer of sophistication, protection, and stylistic customization. Consider framing your metal print when:
- You desire a more traditional or finished look: If you prefer a more classic or ornate presentation, a frame can bridge the gap between the modern metal print and traditional decor.
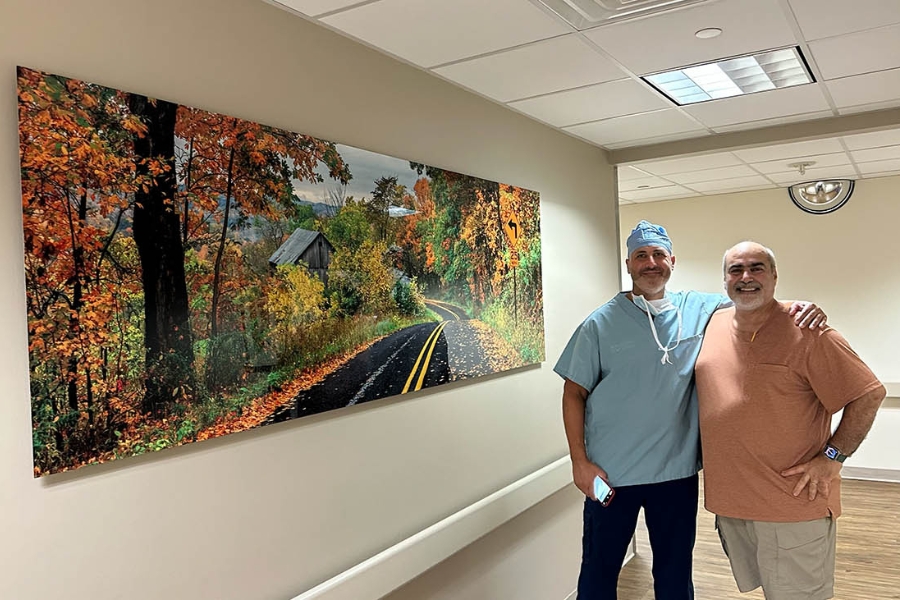
- You want to enhance a particular style: Frames can complement your photograph’s subject or theme. For example, a rustic wood frame can enhance a landscape photo, while a sleek metallic frame might be perfect for an urban cityscape.
- You wish to add depth and dimension. A well-chosen frame can create a visual border that helps the image pop and draws the viewer’s eye inward.
- You require additional protection: While metal prints are durable, a frame offers extra protection against dings and edge damage.
- You need to create a gallery wall arrangement: Frames can help tie multiple pieces together and create a cohesive gallery wall display.

Choosing the Right Frame for Your High-Definition Metal Prints
Selecting the correct frame is key to ensuring it complements your High-Definition Metal Prints without overpowering it. Here are a few factors to consider:
- Frame Style:
- Minimalist Frames: Thin, sleek metal or wood frames are ideal for maintaining the modern aesthetic of metal prints. They provide a subtle border without detracting from the image itself.
- Floater Frames: These frames create the illusion that the print is floating within the frame, adding a contemporary, gallery-like feel. They work exceptionally well with metal prints, enhancing the print’s inherent depth.
- Classic Wood Frames: Consider a classic wood frame if you’re going for a warmer or more traditional look. Choose a wood finish that complements the colors in your photo.
- Metallic Frames: Metallic frames, like brushed aluminum or gold, can echo the metal of the print and further enhance its modern appeal.
- Frame Color: The frame color should complement your image, not clash. Consider neutral colors like black, white, gray, or natural wood for versatility. You can also consider metallic tones for a unified look.
- Frame Thickness: Opt for a frame that’s proportionate to the size of your metal print. Thinner frames are generally better for smaller prints, while larger prints can handle thicker frames without feeling overwhelming.
- Matting (or lack thereof): Metal prints are often displayed without matting. However, if you are using a frame that requires matting, it can add to the overall look. A wide mat can visually draw the eye inward, making your print a focal point.
How do you hang your metal prints precisely and securely?
The hanging method can impact how your metal print looks and feels. Here are some crucial hanging tips:
- Plan Your Placement: Before you start hammering nails, take time to map out where you want to hang your metal print. Use painter’s tape to mark the intended location on the wall. Step back to view the placement from different angles to ensure it fits your space and vision.
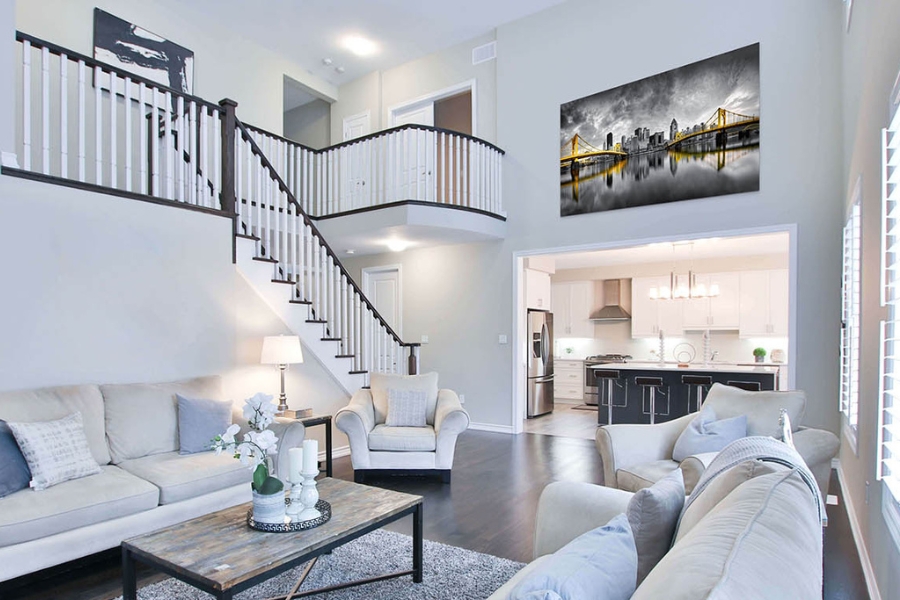
- Consider the Surrounding Space: Consider existing artwork, furniture, and the overall room design. Your metal print should complement its environment and draw attention without feeling out of place.
- Measure and Mark: Once you’ve decided on the placement, carefully mark the spot where you’ll hang your print using a level. Accuracy is crucial to ensure the print is straight and hangs securely.
- Choose the Right Hardware: Select the appropriate hardware based on the weight of your metal print and the type of wall you’ll be mounting it on. Here are some options:
- Wire or String: If your metal print has a wire hanger attached, use picture hooks that can support the weight. Ensure the wire is securely fastened and has a small amount of slack for slight adjustments.
- D-rings: D-rings can be attached to the back for heavier prints, and sturdy picture hooks should be used to hang them.
- French Cleats provide a secure mounting method, especially for heavier metal prints. One half of the cleat is attached to the back of the print, and the other half is securely fastened to the wall.
- Adhesive Hanging Strips: For smaller prints and smoother walls, adhesive hanging strips can be convenient. Always check their weight capacity to ensure they can safely hold your print. Be mindful to use strips specifically designed for artwork and ensure that the wall and the back of your print are clean and debris-free.
- Level and Adjust: After mounting your metal print, use a level to ensure it’s perfectly straight. Make minor adjustments until the print sits perfectly horizontally on the wall.
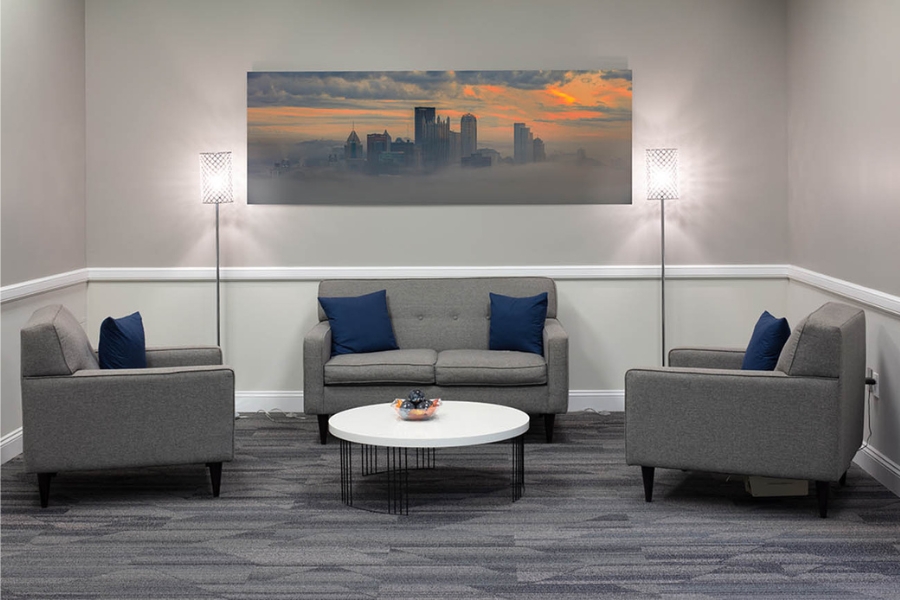
- Consider Lighting: Proper lighting can significantly enhance the visual impact of your metal print. Position your lights to highlight the piece without causing harsh reflections. Track lighting or spotlights can be ideal for this purpose.
- Safety First: Always follow the manufacturer’s instructions when using hanging hardware. If you’re unsure about your ability to hang the print safely, consider hiring a professional.

Creating a Cohesive Display
Whether displaying a single metal print or creating a gallery wall, thoughtful planning can make all the difference. Here are some additional display tips:
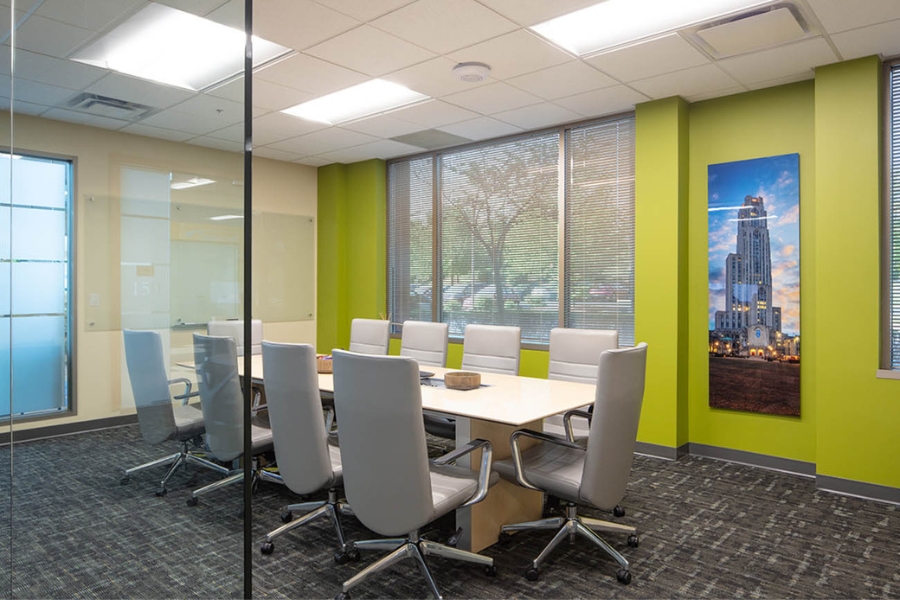
- Vary Sizes and Shapes: Incorporate metal prints of different sizes to create visual interest. Don’t be afraid to mix horizontal and vertical prints.
- Use Different Frames: Mix and match frame styles and colors for a layered, eclectic feel.
- Group by Theme or Color: Create a cohesive display by grouping metal prints with a similar theme, subject matter, or color palette.
- Leave Breathing Room: Don’t overcrowd your wall space. Allow enough space between prints so that each can be appreciated individually.
- Add other textures: Mix metal prints with different types of artwork, like canvases or framed prints, to create texture and visual interest.
- Change it up: Rearrange your metal prints periodically to give your space a new look.
Conclusion
Displaying high-definition metal prints is about more than just hanging them on a wall; it’s about crafting a visual experience that showcases the beauty and vibrancy of your photography. By understanding the nuances of framing, hanging, and overall placement, you can elevate your metal prints from mere decoration to striking focal points within your space. Whether you embrace the minimalist frameless look or add a frame that complements your style, these tips will help you create a stunning display that will be enjoyed for years. So take your time, plan carefully, and let your metal prints shine.
Do you have any unique tips or tricks for displaying metal prints? We’d love to hear them! Leave your ideas and questions in the comments below. And if you’re ready to find the perfect metal print to get started, check out my work. Let’s continue the conversation and create stunning visual experiences!
More information about High-Definition Metal Prints
Frequently Asked Questions About Displaying High-Definition Metal Prints
We’ve covered much about framing and hanging metal prints, but you might still have some questions. Here are some frequently asked questions to help you further:
- Q: Can I hang a metal print in a bathroom or kitchen?
A: Yes, you can! One of the significant advantages of metal prints is their durability. They are water-resistant, so they can be displayed in areas with high humidity, such as bathrooms and kitchens, without worry of damage. However, avoid direct, prolonged exposure to very high heat, which could potentially cause slight warping over time. - Q: Do metal prints need glass in the frame?
A: No, metal prints do not need glass in the frame. Adding glass is often discouraged as it can cause glare and detract from the clarity and vibrancy of the print. Metal prints are durable and scratch-resistant, so they don’t require extra glass protection. - Q: What is the best way to clean a metal print?
A: Cleaning a metal print is simple. Use a soft, lint-free cloth (like microfiber) to wipe away dust or fingerprints gently. For more stubborn marks, lightly dampen the cloth with water. Avoid harsh chemicals, abrasive cleaners, or paper towels, as these can scratch or damage the print’s surface. - Q: Can I frame a metal print myself?
A: Yes, you can absolutely frame a metal print yourself! However, keep in mind that not all standard frames are suitable. Ensure that the frame has enough depth to accommodate the thickness of the metal print and any mounting hardware. Floater frames, for example, are specifically designed for this purpose. - Q: How much space should I leave between metal prints on a gallery wall?
A: There’s no hard and fast rule, but leaving 2-4 inches between metal prints on a gallery wall is a good starting point. This allows each piece to stand out individually while maintaining a cohesive look. You can adjust this spacing based on the size of your prints and the overall effect you’re trying to achieve. A smaller space might look more formal, while more significant gaps could achieve a more relaxed or contemporary look. - Q: My metal print is heavy. What’s the most secure way to hang it?
A: For heavy metal prints, the most secure methods are French cleats or D-rings paired with sturdy picture hooks rated to hold your print’s weight. Adhesive strips may not be adequate for heavy prints and could pose a safety risk. Always prioritize using hardware that is strong enough and correctly installed. When using D-rings, ensure they are firmly screwed to the back of the print. - Q: Should I use a mat with my metal print?
A: Generally, metal prints are not matted. The frameless look is part of their modern appeal, and a mat can sometimes interfere with the image’s visual depth. However, if you use a more profound or traditional frame and wish to use a mat for a specific style, you can ensure that it does not obscure the image. Opt for neutral-colored mats to avoid overpowering the photograph. - Q: Can I use adhesive strips to hang my metal print?
A: Adhesive strips can be a convenient solution for lightweight metal prints on smooth surfaces. However, they are not recommended for heavy prints, textured walls, or high-traffic areas where the print could easily be bumped. Always check the weight capacity of the strips and ensure both the wall and the back of the print are clean before application. If you’re in doubt, use a more secure hanging method. - Q: How can I prevent glare on my metal print?
A: While metal prints have a reflective surface, you can minimize glare by carefully considering your lighting. Avoid placing bright lights directly in front of the print. Instead, opt for softer, indirect, or track lighting that can be angled to highlight the print without causing harsh reflections. Also, angling the print slightly can help reduce glare. - Q: Where can I find the best frames for metal prints?
A: Many art supply stores, online retailers, and framing shops offer frames suitable for metal prints. Look for frames with enough depth to accommodate the print, and consider minimalist, float, or metallic frame styles that are particularly well-suited for metal prints. Some metal print providers also offer framing services, which may be convenient. - Q: Can I display metal prints outdoors?
A: Metal prints are durable but primarily designed for indoor use. Prolonged exposure to harsh outdoor elements like direct sunlight, extreme temperatures, and rain can potentially cause fading or damage over time. If you plan to display a metal print outdoors, ensure it’s in a covered area with limited exposure to the elements.
