


Point of View Statue – Pittsburgh
Discover one of Pittsburgh’s best photography spots, offering breathtaking skyline views from Grandview Avenue!
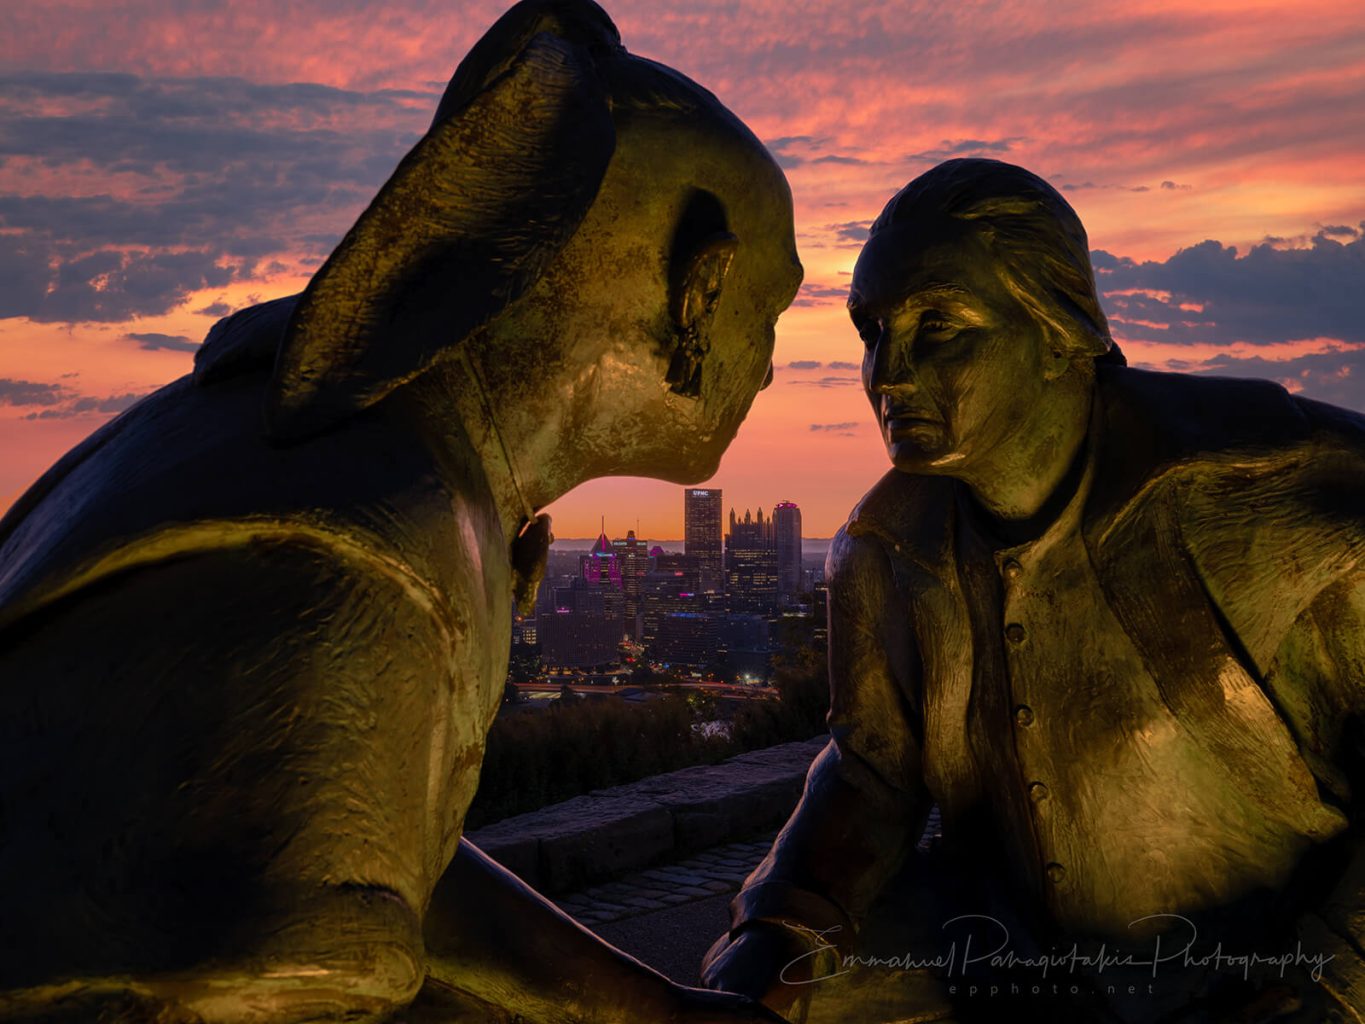
From the lofty perch of the Point of View Monument on Mount Washington, Pittsburgh unfolds as a breathtaking tapestry of industry, history, and natural beauty. The monument, a larger-than-life bronze sculpture commemorating the historic meeting of George Washington and Seneca leader Guyasuta in 1770, frames the city’s iconic skyline. In the distance, the towering skyscrapers of the Golden Triangle stretch towards the horizon, a testament to Pittsburgh’s industrial past and technological present. Below, the three rivers—the Allegheny, Monongahela, and Ohio—converge, their waters reflecting the city’s vibrant energy.
Why is this a good location to capture Pittsburgh?
Dramatic Composition:
- Foreground Interest: The imposing bronze sculpture adds depth and historical significance to the image.
- Middle Ground: The city skyline, with its iconic skyscrapers, provides a strong visual anchor.
- Background: The converging rivers create a dynamic and visually appealing backdrop.
Play of Light and Shadow:
- Golden Hour: Capturing the scene during sunrise or sunset can create a magical atmosphere with long shadows and warm light.
- Night Photography: The illuminated city skyline and the monument can produce stunning night shots.
Rich Historical Context:
- The sculpture itself tells a story, adding a layer of historical significance to the image.
- The juxtaposition of the old (the sculpture) and the new (the skyline) highlights the city’s evolution.
Panoramic Potential:
- The wide-angle view allows for capturing the grandeur of the city and the surrounding landscape.
- A panoramic shot can fully showcase the dramatic panorama.
Unique Perspective:
- The elevated viewpoint offers a distinctive perspective that few can experience.
- This unique vantage point can create striking and memorable photographs.
Getting There
The monument is located at 1435 Grandview Ave, Pittsburgh, PA 15211 close to the intersection of Sweetbriar Street and Grandview
Google Maps Link
- Parking Options:
- Street Parking beside the Duquesne incline upper station: Free before 8 AM and after 6 PM, but spaces fill up quickly, especially after 4 PM. It is a 3-5 minute walk from the station.
- Parking Lot: Across from the Duquesne Incline, costs $12 (approx.) Google Maps Link
Best Time to Visit:
- Season: Any time of the year for amazing views of the Pittsburgh skyline.
- Time of Day: Sunrise and sunset provide the most dramatic light for photography.
Crowd Factor:
- Evening: Popular during nice weather. Arrive at least 1 hour before sunset to secure your spot.
- Morning: Generally quiet, but early arrival ensures the best vantage point.

Tips for capturing the perfect shot when using a DSLR or Mirrorless Camera.
Photography Tips
- Use a tripod to stabilize your camera for long exposures.
- Focus Stacking: To get sharp detail in both the statue and the city skyline, take multiple images (focus on the statue for one shot and the skyline for another), and merge them during editing.
- Lens Recommendation: A wide-angle lens works best to capture both the Point of View Statue and the sweeping view of Pittsburgh.
Rule of Thirds
- Place the monument and the skyline on the intersecting points of the rule of thirds grid. This will create a more dynamic and visually appealing composition.
- Consider placing the horizon line along one of the horizontal lines of the grid. This can help to balance the sky and land elements in your image.
Framing
- Use the monument itself as a frame to isolate and emphasize specific elements of the city skyline.
Perspective
- Experiment with different focal lengths to create various perspectives. A wide-angle lens can capture the panoramic view, while a telephoto lens can isolate specific details.
- Consider using a low angle to emphasize the height and grandeur of the city skyline.
To take stunning photos with your iPhone, consider these essential tips:
Composition Techniques:
- Rule of Thirds: Divide your image into thirds, both horizontally and vertically. Place key elements along these lines or at their intersections for a more balanced shot.
- Leading Lines: Use lines in the scene, like roads or rivers, to guide the viewer’s eye toward the main subject.
- Framing: Utilize natural elements, such as trees or buildings, to frame your subject and add depth to your image.
- Perspective: Experiment with different angles and zoom levels to create unique perspectives.
Lighting and Exposure:
- Golden Hour and Blue Hour: Take advantage of these times for soft, warm light or a moody, atmospheric look.
- Adjust Camera Settings: Use your iPhone’s settings to control exposure, focus, and white balance. Tap to focus on a specific area, swipe to adjust exposure, and tap the sun icon to adjust the white balance.
Remember: Practice and experimentation are key to improving your iPhone photography skills. Don’t be afraid to try different techniques and settings to capture the perfect shot.
